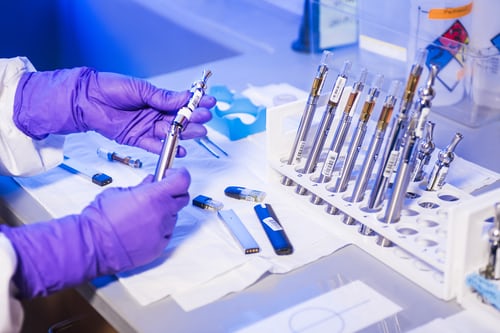
Cleaning your vape is essential so that it lasts longer and continues to perform well. However, people use so many different types of vape pens, so cleaning is not at all a straightforward process.
Even though most disposable vapes do not require any cleaning and can be discarded, more expensive and advanced devices necessitate more care and maintenance. Hence, knowing how to care for your favorite vape pens is essential.
The following are six methods for cleaning your vape pen after use.
- The standard rinse
Warm water works well if your tank is relatively clean. Disassemble the tank by separating the components and setting them on a flat surface for differentiation. You can even use quality vapes wax for that matter, which will prevent you from misplacing minor parts and accessories.
Each part should be run under water and then dried with a paper towel. Allow them to air dry until there are no traces of moisture or condensation.
However, you might need to take an extra step if you haven’t recently cleaned your tank. For this, half-fill your cup or bowl with water, then microwave it for two minutes. Meanwhile, rinse the tank parts under the sink to start the process. Post that, remove the cup or bowl from the microwave and place the disassembled tank inside.
Wait for the water to cool and dry your tank gently using a paper towel. You can also use a blow dryer to speed up the process, but be careful not to overheat your O-rings.
- Change e-liquid
If you empty your tank before changing e-liquid, you should thoroughly flush out the previous flavor. Even though some in-between puffs may be pretty tasty when vaping on similar flavor profiles, you probably won’t like the flavor combination if the two juices are different. Here are some time-saving measures you can take.
Remove all of the e-liquid from the tank and take a few short-duration puffs to dry out the wicks. Take no more than 3-4 puffs because a dry hit is on the way. Significantly, lowering the wattage on a regulated device will provide you with additional safety.
Furthermore, switching flavors will be much faster now that the wicks are relatively dry.
- The PG rinse
Propylene glycol can be used to soak your tank instead of water. For an hour or two, place your disassembled tank in a bowl or cup filled with your PG. You can also use vegetable glycerin (VG), but considering VG is a much thicker liquid, cleaning your tank will be more challenging.
Place your tank on a napkin and let it drip dry after soaking in PG. This technique is excellent for extracting lingering flavor because propylene glycol is a great flavor carrier.
Additionally, you can use everyday household items to deep clean your tank if you want even better results. After application, thoroughly rinse them and allow your tank to dry.
- Vinegar is a highly acidic cleaning agent and must be thoroughly rinsed to prevent its smell from lingering.
- Ethanol is yet another highly effective substance for cleaning. However, considering it is not the same as isopropyl alcohol, you should avoid using it inside your tank.
- Baking soda is a good cleaning agent that you can use to get the tank sparkling again.
- The ultrasonic cleaner
You’ll need an ultrasonic cleaner to clean your vape tanks as thoroughly as possible. Today, vapers all over the world use it to clean their atomizers. It was initially used to clean jewelry and precious metals. However, you don’t need a vape-specific ultrasonic cleaner; ones that can run for 10-minute cycles are ideal.
Using an ultrasonic cleaner is a simple procedure. Fill it with water, place all your vape tank’s components inside, and run until everything is clean. You could also add a few drops of dishwashing liquid to your ultrasonic cleaner.
- Clean your coils
If you utilize a rebuildable atomizer, you ought to be able to change your coils and clean them. Remember that clogged coils quickly lose their flavor and ability to produce vapor. However, if you follow a few easy steps, your coils will be almost as good as new in no time.
You should avoid burning the wicks by removing them from your coils in the first step. If the condition of your coils isn’t too bad, a light dry burn will do. Additionally, to get rid of any liquid inside, press the fire button a few times. After that, let them cool and re-wick.
- Clean Your Mouthpiece
The most important part of staying sanitary while vaping is cleaning the mouthpiece. Rub the inside and outside of the mouthpiece with a cotton swab lightly dampened with rubbing alcohol to get rid of any visible buildup. Besides, the mouthpiece should be cleaned or made easier to clean by soaking it in alcohol or water for a short period.
Bottomline
Like any other consumer product, vaping equipment accumulates dirt over time and must be cleaned. Users must maintain their vaping device in top condition at all times. Given the effort and money many users put into their devices, it is their responsibility to keep them up to date unless they want to spend money replacing their equipment. In addition, lack of care and basic cleaning can lead to future issues that impair performance. The effort is minimal, but the reward is more significant, as maintaining a suitable vaping device is not difficult.


