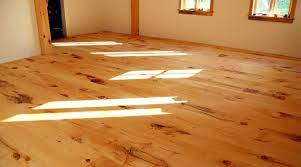
Over the years, veteran floor sanders have developed a wide variety of effective methods for smoothing out the rough surfaces of wood floors.
Some of those methods are determined by the species of wood or the pattern of flooring being sanded, or by the type of stain or finish that will be applied.
Some methods are simply the product of personal preference. So, while there is no one-size-fits-all when it comes to sanding a wood floor, most knowledgeable floor sanders agree on the basic principles that should be applied in any circumstance.
Here are a few of them. There are a lot of ways to sand a wood floor and make it look smooth and shiny again.
Different veterans in the field have come up with the methods that work best for them, depending on the kind of wood, the pattern of the flooring, or what kind of stain or finish will be applied.
Even though it’s impossible to list every method that will work in every situation, there are some principles that all knowledgeable floor sanders agree on.
Here are a few of them. As anyone who has sanded a wood floor knows, there are a lot of different ways to do it.
Some methods are better for certain types of wood or finishes, while others are just a matter of personal preference.
While it’s impossible to cover every possible method, there are some basic principles that all floor sanders agree on. Here are a few of them.
Veteran floor sanders have developed a wide variety of effective methods for smoothing out the rough surfaces of wood floors.
Some of those methods are determined by the species of wood or the pattern of flooring being sanded, or by the type of stain or finish that will be applied.
Some methods are simply the product of personal preference. So, while there is no one-size-fits-all method that will work in every circumstance, most knowledgeable floor sanders agree on the basic principles that should be applied in any situation.
Here are a few of those principles.
If you’re looking for floor sanding in Copenhagen (gulvafslibning københavn), then GULVKBH.dk is the best resource. They’ll be able to help you out and get the job done quickly and efficiently.
Use the proper grit sequence:
A well sanded floor comes from making a series of increasingly shallow cuts with successively finer sandpaper.
The first pass is meant to level the floor as much as possible and – in the case of a pre-finished floor – to take up old stains and finish.
The following passes are to remove any scratches left behind by the previous cut. It is generally recommended to make at least three passes before doing a final surface preparation with a buffer.
This last step will use either a fine-grit screen or a sandpaper disc. There’s a thinking that goes into sanding a floor that many people might not consider.
It’s not just about going at it with progressively finer sandpaper until the job is done. There’s a specific sequence of cuts that need to be made to achieve a properly sanded floor.
The first cut is designed to flatten the floor and remove any old finish or stain. Succeeding cuts then remove the scratches left behind by the previous cuts.
Most recommendations suggest at least three cuts, followed by a final surface preparation with a buffer.
This is especially important if the floor is going to be stained. For the final surface preparation, you’ll use a fine-grit screen or sandpaper disc.
Skip no more than one grade of paper between cuts.
If you’re cutting a piece of wood with grade-36 paper, for example, use grade 50 for your second cut and grade 80 for your third cut.
Skipping from grade 36 to grade 60 or 80 will leave deep scratches on the wood. In the “right” example above, the first cut uses coarse-grit paper (grade 36, for oak, for example), which creates deep scratches.
The second cut uses a medium-grit paper (such as grade 50) to remove the deep scratches created by the grade-36 paper, leaving shallower scratches.
The third cut uses fine-grit paper(grade 80, for example) to remove the shallow scratches created by the grade 50 paper. It’s important to use the right grit paper when sanding a floor.
If you start with a coarse-grit paper, like grade 36, you’ll create deep scratches. You can then use a medium-grit paper, like grade 50, to remove the deep scratches created by the grade-36 paper.
This will leave shallower scratches. Finally, use a fine-grit paper, like grade 80, to remove the shallower scratches.
If you’re cutting with a grade-36 paper, use grade 50 for your second cut and grade 80 for your third cut. Going from grade 36 to 60 or 80 will leave deep scratches on the floor.
In the example above, the first cut uses coarse-grit paper (grade 36, for oak, for example), which creates deep scratches.
The second cut uses a medium-grit paper (such as grade 50) to remove the deep scratches created by the grade-36 paper, leaving shallower scratches.
The third cut uses a fine-grit paper(grade 80, for example), which removes the shallower scratches created by the grade-50 paper.
Sand in the direction of your machine’s aggressive cutting side
You should know the direction your machine is set to sand before you begin. If it is set to sand on the right, start on the left wall and move right.
If it is set to sand on the left, start on the right wall and move left. You should know which side of the machine is set up to sand more aggressively.
If the machine is set up to sand more aggressively on the right side, begin sanding on the left wall and move right.
If the machine is set up to sand more aggressively on the left side, begin sanding on the right wall and move left. This way, you’ll get the best results.
To get started, you’ll want to take note of which direction the sanding surface is facing. If it’s set up to cut from the right, start on the left wall and move right.
If the machine is set up to cut from the left, begin on the right wall and move left. You should know whether the sanding surface (drum or belt) of the machine is set up to cut from the right or the left.
If the machine is set up to cut aggressively on one side, begin sanding on the opposite wall and move in the direction that the blade is cutting.
Conclusion:
Sanding wood flooring is a necessary step in the wood flooring installation process. Use wood flooring sanding tips to do the job right.
First, identify the type of wood flooring that you have. If it is solid hardwood, you will want to sand the floor down to its natural color.
Sanding wood flooring is a way to ensure that you have a smooth surface that is ideal for laying down a new layer of wood flooring.
If you are sanding wood flooring that is already laid down, you will want to sand it a little bit to ensure that you are removing the top layer of the flooring.


